
Guide · Defender Td5 clutch replacement
Defender Td5 clutch replacement: our step-by-step guide to the LOF kit and single mass flywheel
A Defender Td5 clutch replacement was the job Julien took on at home before our next big trip around the world. One LOF Clutches kit, a single mass flywheel, ten hours under the Defender and around thirty annotated photos. Here’s every step in order, all the torque settings and the traps we’d rather warn you about before you fall into them.
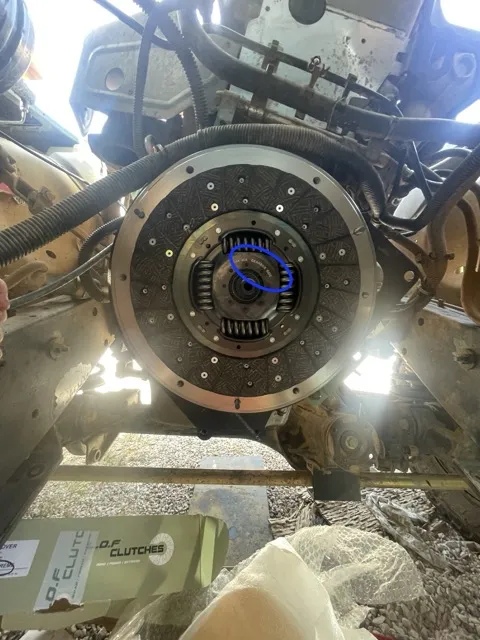
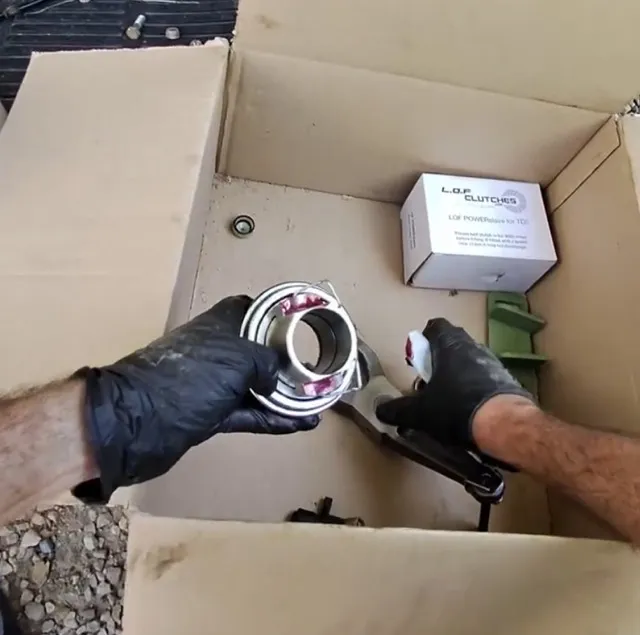
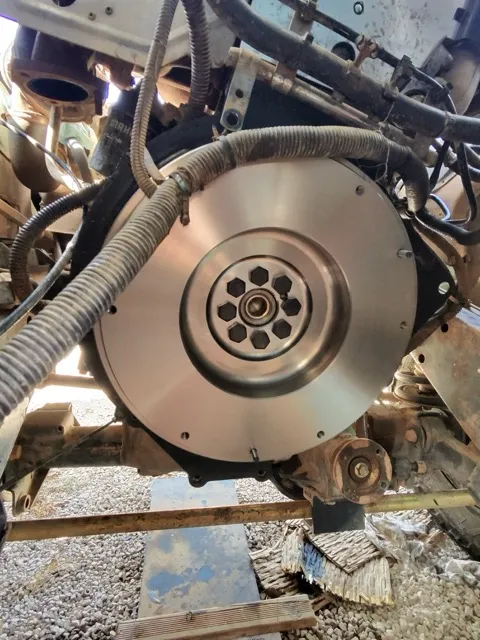
Why we replaced the clutch on our Defender 130 Td5
Our 130 travels heavy: camper body, water, tools, spare parts… A clutch takes all of that on every hill start, every river crossing, every hour spent crawling in first gear on a track.
On a Td5, the known weak spot is the dual mass flywheel. As the miles build up, it develops play and ends up rattling when you switch the engine off. Setting off for months with a clutch of unknown age is betting on a breakdown in the worst possible place. We’d rather do our Defender Td5 clutch replacement at home, calmly, with the right parts.
If you’ve typed “Defender Td5 clutch replacement” into a search engine, chances are yours is slipping on loaded climbs, biting right at the top of the pedal travel or rattling at idle. You’re in the right place.
The single mass flywheel
No internal springs to wear out, no pricey dual mass flywheel to buy again in another hundred thousand miles. The LOF flywheel weighs exactly the same as the original dual mass unit, and its sprung clutch plate matches the damping of the original Valeo: no nasty vibration. LOF sells around a hundred single mass kits for every dual mass one.
Built to carry weight
LOF offers three levels: ROADspec for the road, POWERspec for vehicles that tow or travel loaded on expeditions, and EXTREMEspec for bigger turbos and very hard use. We went for EXTREMEspec, on Luke’s advice.
The complete LOF Clutches kit
Everything a Defender Td5 clutch replacement calls for: clutch alignment tool and flywheel locking tool included, plus bolts, fitting instructions and videos. The assemblies are balanced and fit straight in place of the originals, no modifications needed.
Land Rover specialists
A British company that makes nothing but Land Rover clutches, with a two-year warranty and a team that actually answers technical questions. On a job like this, that matters.
The LOF Clutches parts
The complete kit we used for our Defender Td5 clutch replacement includes the single mass flywheel, clutch plate, pressure plate, release bearing, bolts, rear crank seal, spigot bush, clutch fork, alignment tool and flywheel locking tool. Here are the direct links.
Before you start
Tools for a Defender Td5 clutch replacement
Have everything within reach before the vehicle goes up. The hoist is non-negotiable: an R380 is not something you lift by hand.
Tools
- Socket set and ratchet, with a long extension
- 15 mm socket and spanner
- Viscous fan spanner
- 9/16 spanner and propshaft spanner (or a ground-down 9/16 socket)
- 24 mm spanner for the anti-roll bar
- Hammer and pry bar
- Slide hammer, or a socket and some bread
- Torque wrench
- Chain hoist or engine crane, strap, wooden block and jack
- Marker pen
- Clutch alignment tool LOF kit
- Flywheel locking tool LOF kit
Parts & consumables
- LOF Td5 single mass clutch kit: clutch plate, pressure plate, release bearing
- LOF single mass flywheel and bolts
- Brass crankshaft spigot bush
- Rear crank seal
- Clutch fork and pushrod
- Propshaft bolts or nyloc nuts
- Threadlocker and Loctite
- Sump gasket
- Grease, degreaser and gasket sealant
Our approach. for our Defender Td5 clutch replacement, we took the LT230 transfer box and the R380 gearbox out separately. Two lighter units, much easier to manage on your own with a hoist. With an engine crane, pulling the lot out in one piece is quicker: in that case, skip stage 3.
Keep these handy
Torque settings for a Defender Td5 clutch replacement
Every torque figure for a Defender Td5 clutch replacement in one place. Bookmark this page, you’ll be coming back to it a lot during the refit.
Engine & clutch
- Rear crank seal housing9 N·m
- Flywheel40 N·m + 90°
- Pressure plate to flywheel28 N·m
- Lower bell housing to engine bolts50 N·m
Bell housing & release
- Clutch fork bolt10 N·m
- Release bearing guide (2 bolts)25 N·m
- Bell housing to gearbox75 N·m
- Clutch slave cylinder25 N·m
R380 gearbox & LT230 transfer box
- R380 studs (with Loctite)45 N·m
- R380 to LT23045 N·m
- Breather banjo bolt15 N·m
- Reverse light switch24 N·m
- Gearbox drain plug30 N·m
Mounts, brakes & driveline
- Gearbox mount bolts85 N·m
- Rubber mounts48 N·m
- Handbrake backplate72 N·m
- Propshaft UJ nuts48 N·m
Stage 1 · Preparation
Defender Td5 clutch replacement: clearing the cab and the engine bay
Before you slide under the Defender, make room everywhere.
Strip the cab and disconnect the battery
Take out the seats, the cubby box and the gearbox tunnel. Working from above makes everything that follows much easier, especially the hoist and the transfer box. While you’re at it, disconnect the battery now.
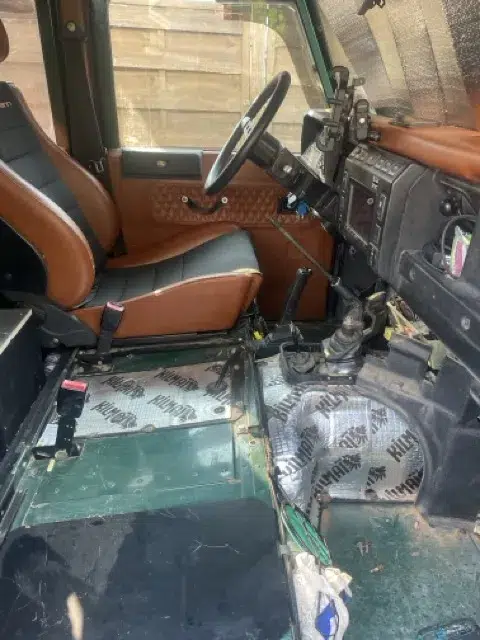
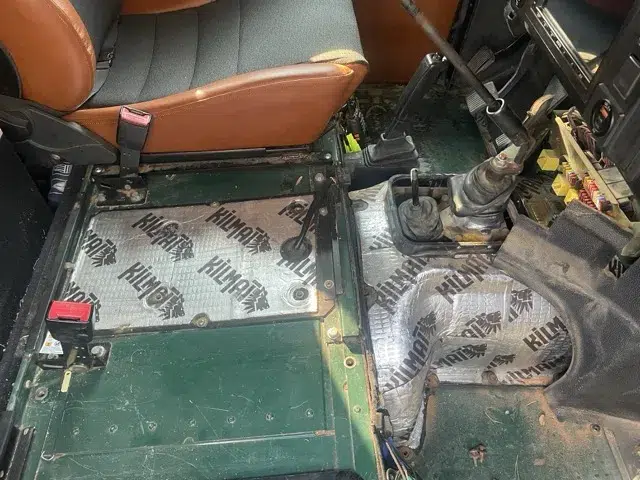
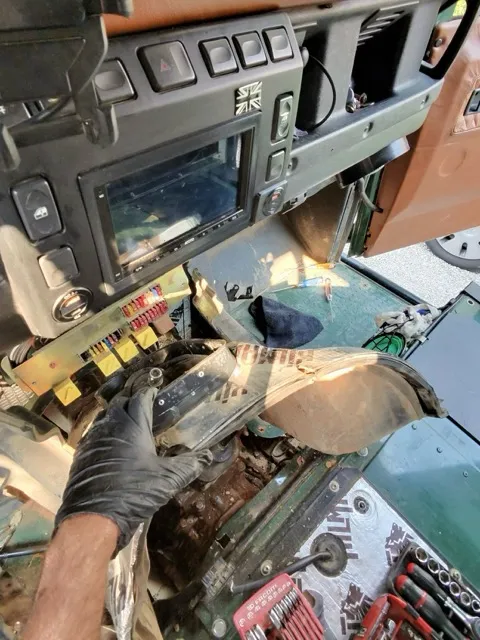
Transfer box linkage and diff lock sensor
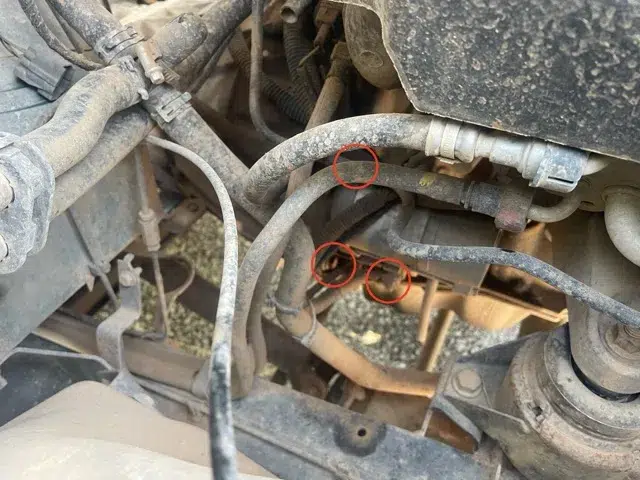
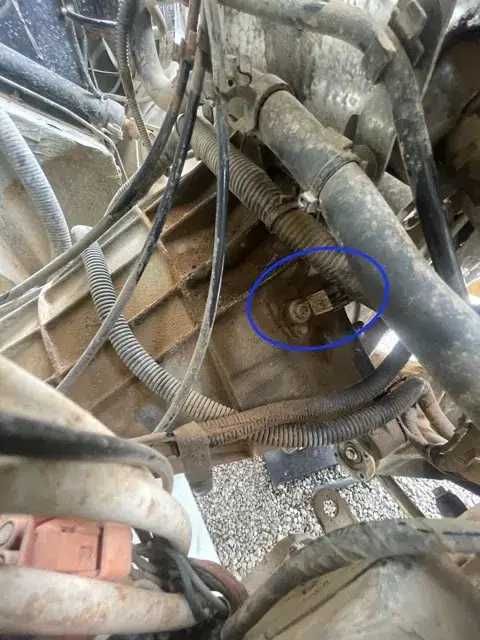
Remove the transfer box selector linkage: one 10 mm nut and a clip. Keep an eye on the little plastic bushes, they love to disappear. Then unplug the diff lock sensor (blue circle).
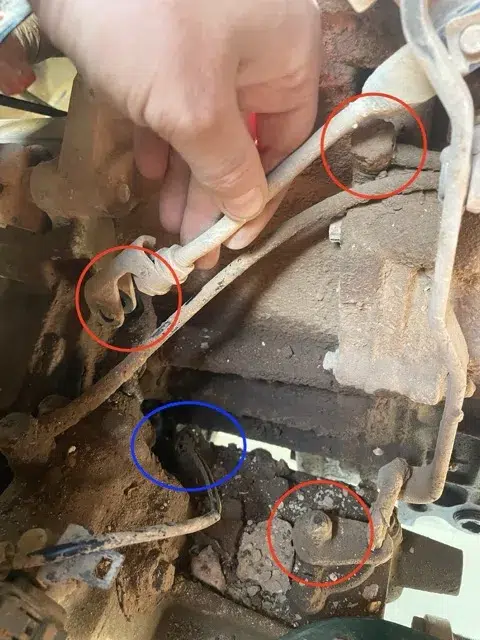
Engine side: viscous fan, airbox, starter
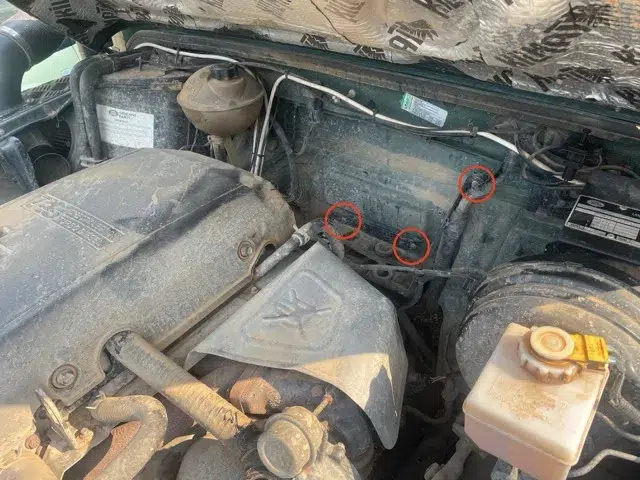
Viscous fan first, with a viscous fan spanner. As the gearbox comes down, the engine can tip backwards and the blades would chew up the radiator. Next, lift out the airbox (it only sits on rubber mounts) and its bracket, three 10 mm nuts. That clears the way to the top bell housing bolt.
Don’t forget the crankshaft position sensor on the bell housing, starter side (blue circle). Then the starter motor: two 16 mm bolts you can reach from underneath, and one nut on top against the block, which you’ll get with a long extension.
Stage 2 · Underneath
Defender Td5 clutch replacement: crossmember, exhaust and propshafts
Time to get under the Defender for the serious stuff. Everything tying the gearbox to the chassis and the axles has to go.
Remove the gearbox crossmember
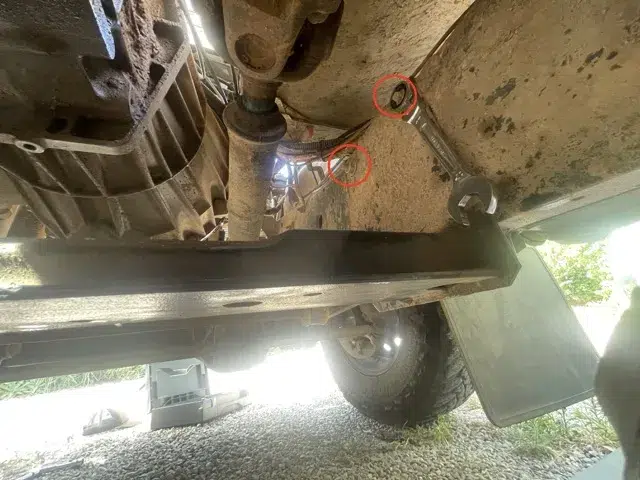
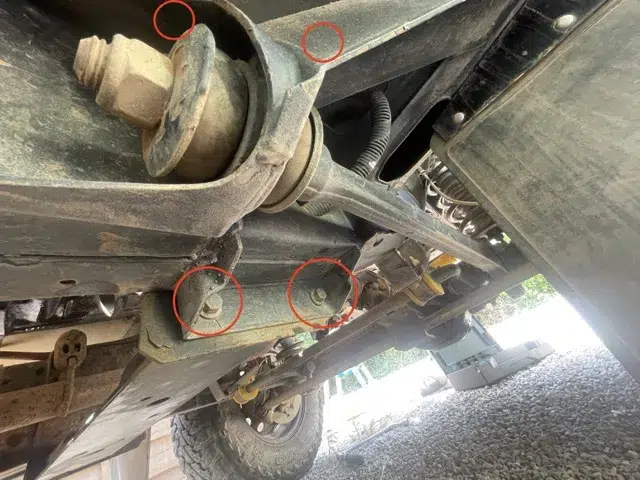
Four bolts underneath, four on top. Even once they’re all out, the crossmember usually stays wedged between the chassis rails, so a few taps with a hammer are needed to get it down.
Exhaust downpipe
Remove the downpipe, from the catalytic converter back to the centre silencer. It frees up all the space under the gearbox.
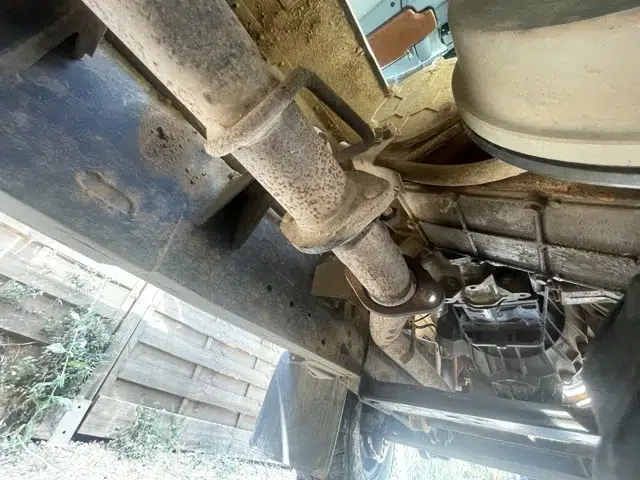
Propshafts
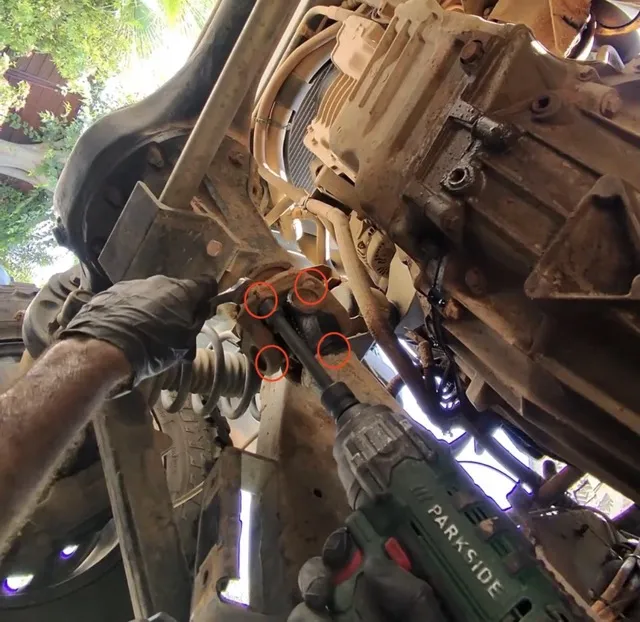
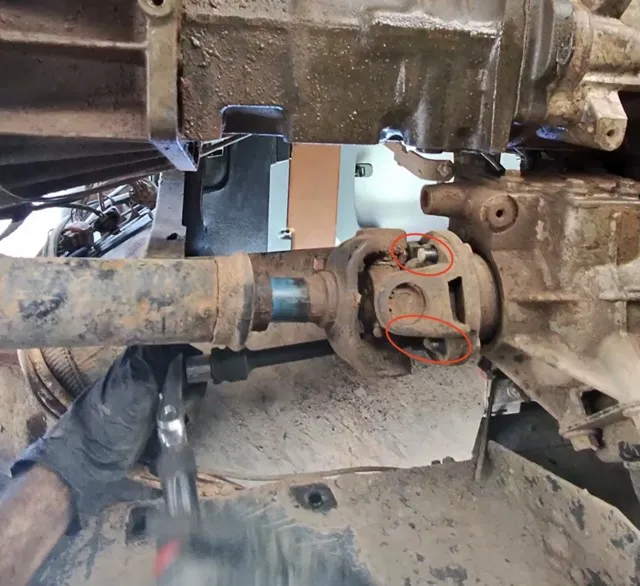
Before touching anything, draw a marker line across the axle flange and the propshaft. Refitted in the same position, they won’t vibrate. Undo them with a 9/16 spanner and a propshaft spanner (a ground-down 9/16 socket works too).
Parts to replace. the propshaft bolts, or at the very least their nyloc nuts. They’re not meant to be reused.
Handbrake, earth straps and speed sensor
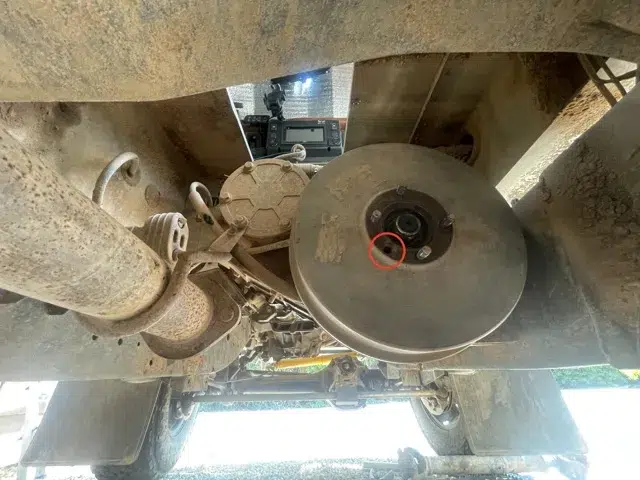
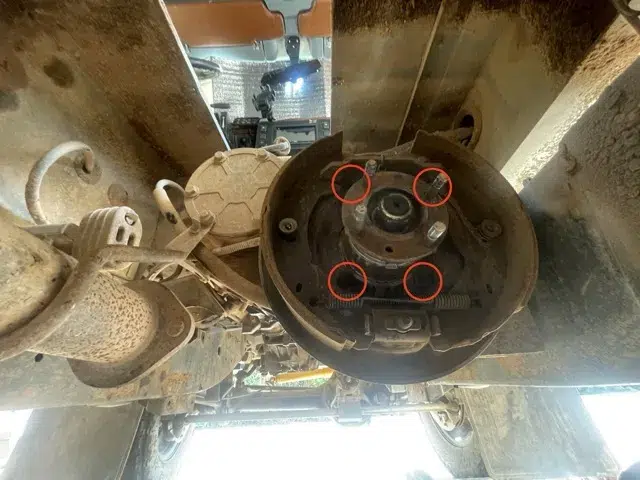
Take off the handbrake drum and its screw, then the four bolts behind it. Pull out the whole handbrake assembly and tuck it out of the way.
Next, disconnect the earth straps on both sides, then the speed sensor and its green connector.
Careful. that sensor is expensive. Unplug it gently and keep it well away from any hammering.
Stage 3 · Transfer box
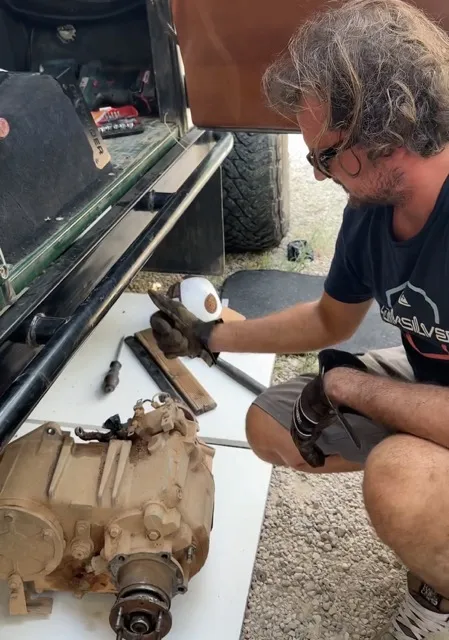
Removing the LT230 transfer box
Here we split the LT230 from the R380 to take out two lighter units. Pulling the lot in one piece with an engine crane? Skip straight to stage 4.
Support the engine and rig the hoist
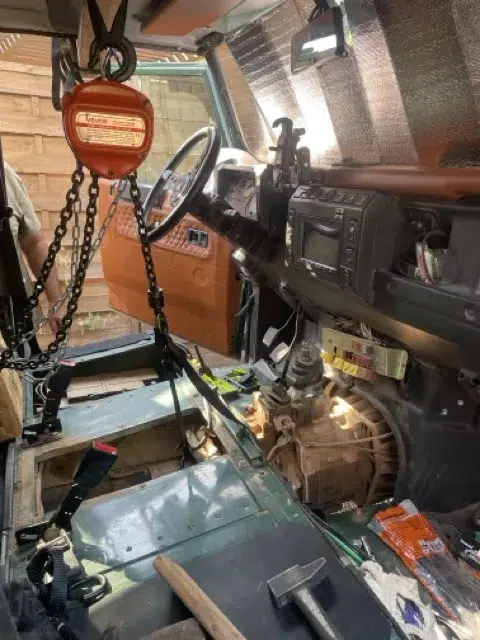
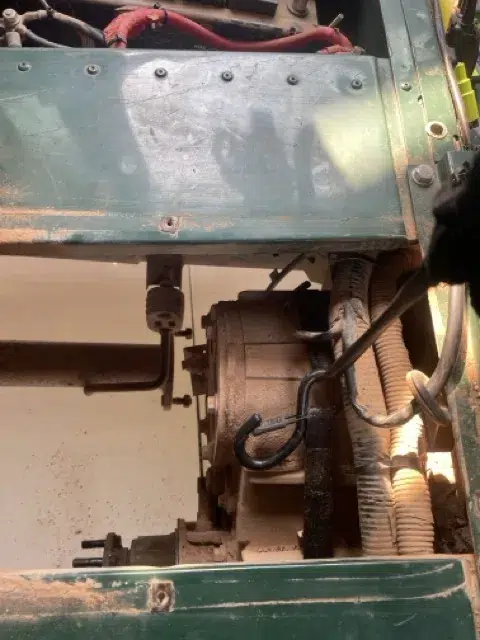
Chock the engine with a block of wood and the original jack so it can’t tip when the gearbox comes away. Then hang the chain hoist over the middle of the transfer box, with a strap wrapped around the casing.
Separate and lower the LT230
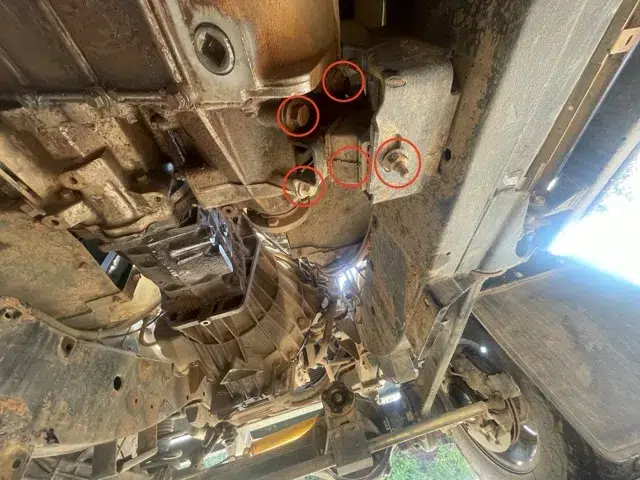
Back underneath: remove the transfer box mount (four 15 mm bolts) and the rubber mount nut. Finish with the two nuts and three bolts holding the LT230 to the R380.
It should come away on its own. If not, a little leverage with a pry bar, then lower it gently to the ground.
Stage 4 · Gearbox
Removing the R380 gearbox and bell housing
Round two of the Defender Td5 clutch replacement, this time the gearbox. Move the hoist so it sits centred over the gearbox, just behind the serial numbers.
Slave cylinder, mount and bell housing
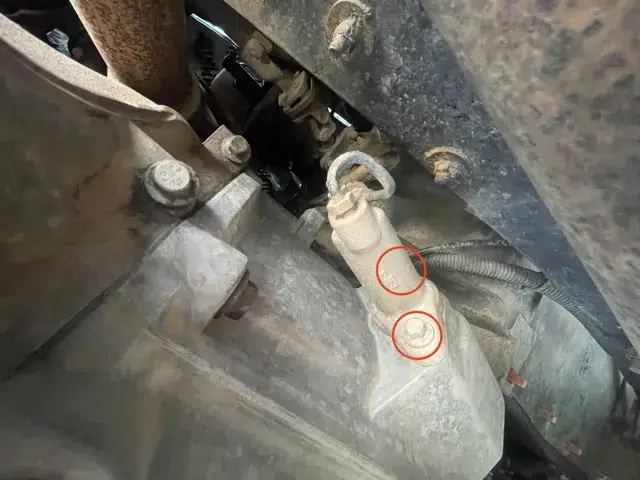
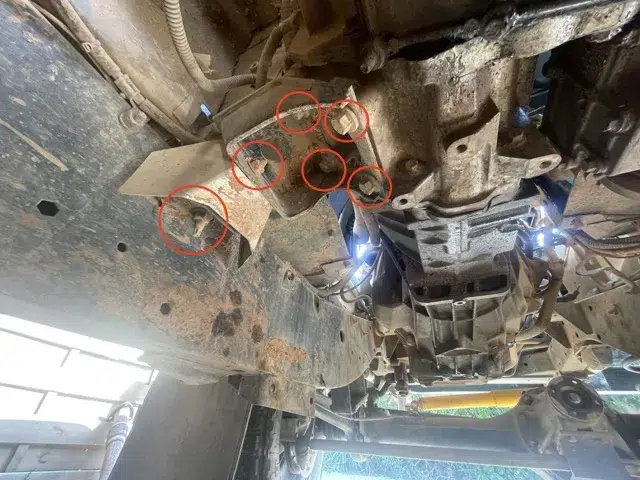
Unbolt the clutch slave cylinder and hang it to one side. Don’t forget the reverse light switch connector. Then remove the four 15 mm mount bolts and the left-hand rubber mount nut.
Finally, undo all the bell housing bolts. A bit of leverage and it comes free of the engine.
Tip. the R380 input shaft is long. Pull the gearbox well back before lowering it, or it will catch on the clutch.
Stage 5 · Clutch removal
Defender Td5 clutch replacement: taking out the clutch and flywheel
Finally, the clutch. This is where you find out what state everything is really in after all those miles.
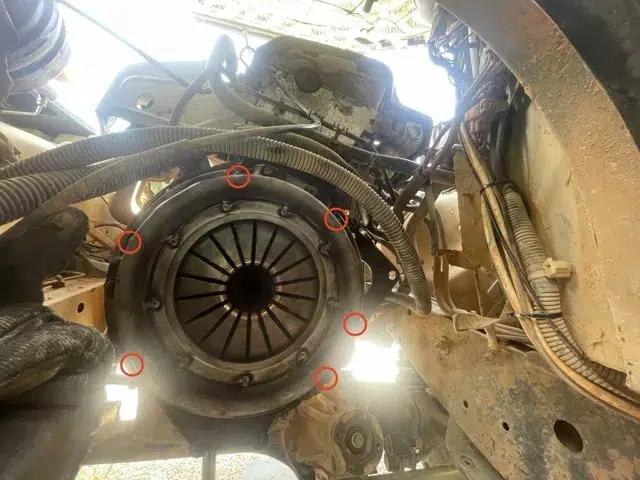
Pressure plate and clutch plate
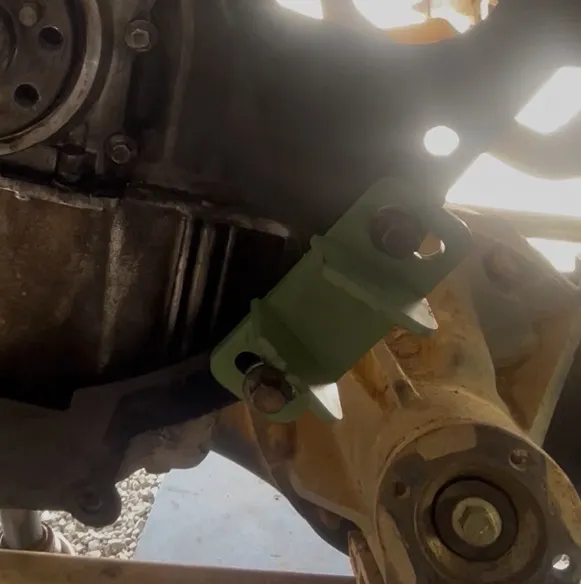
Lock the flywheel with the LOF flywheel locking tool. Slide the clutch alignment tool into the plate, then undo the pressure plate and lift the whole assembly out in one go.
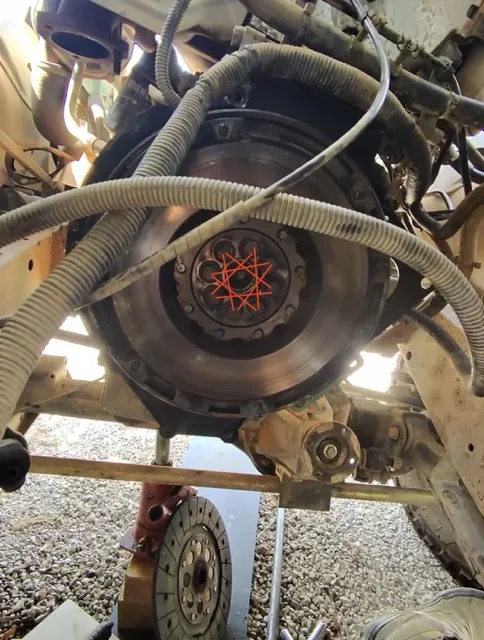
Flywheel
Undo the flywheel bolts in a star pattern, never working your way round.
Careful. the flywheel is heavy. Keep a hand underneath as the last bolt comes out.
That’s everything off. Before refitting a single part, clean every component and every mating surface thoroughly.
Stage 6 · Refit
Defender Td5 clutch replacement: fitting the LOF kit
The best part: everything is clean, everything is new. Keep the torque settings in front of you.
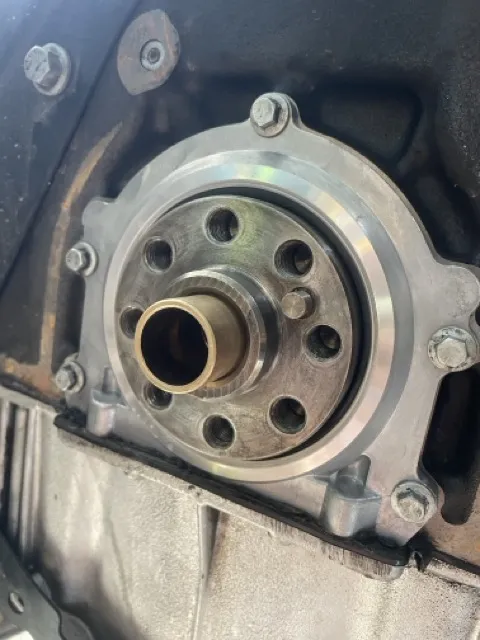
Replace the brass spigot bush
Do this every time, with a new genuine spigot bush. To get the old one out, use a slide hammer or the bread trick: pack the bush with bread (or grease), push in a socket or a bar the same diameter as the bore, and tap it. The pressure pushes the bush out.
Clean the flywheel face on the crank and the bush seat, then drive the new bush in with a hammer and a block of wood so it goes in square.
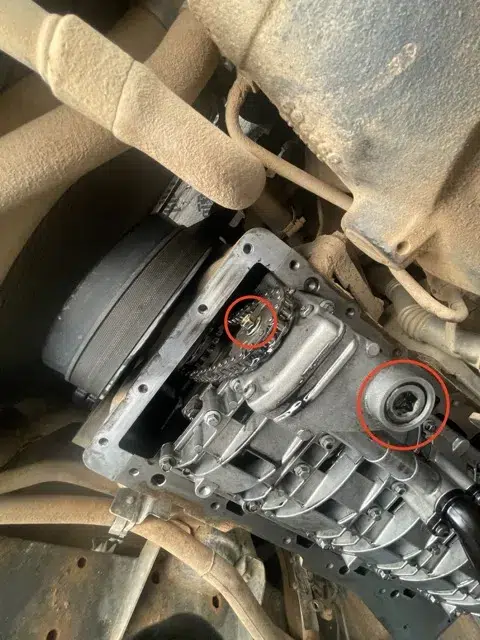
Sump and oil pump
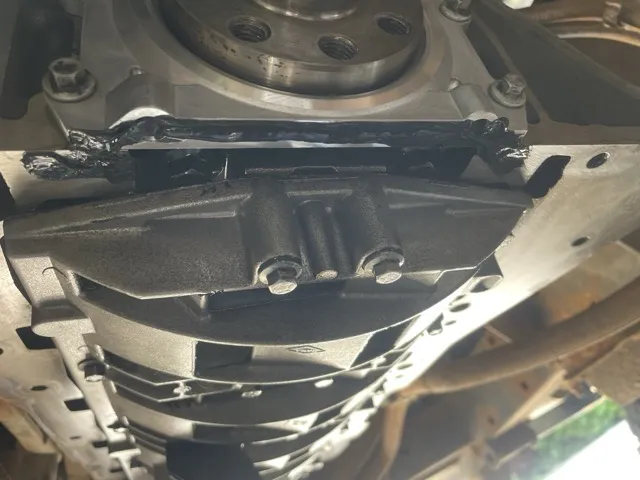
To replace the rear crank seal, the sump has to come off. Once it’s down, make the most of it: check the oil pump bolt and the pressure relief valve bolt, and refit them with threadlocker.
Td5 weak spot. on some engines these bolts were fitted without threadlocker. If they back off, the engine loses oil pressure. Ten minutes of work that can save the engine.
Rear crank seal
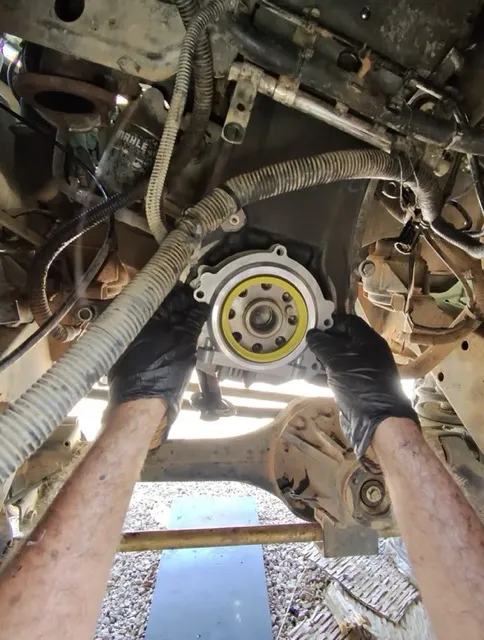
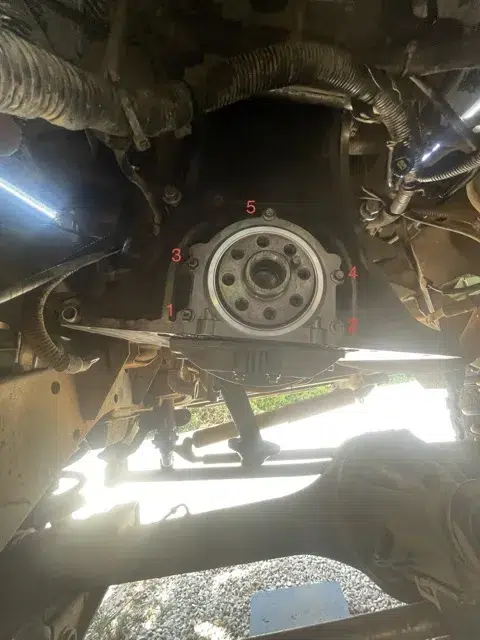
Fit the new crank seal using the yellow plastic guide and slide it over the crankshaft. Torque the housing to 9 N·m, following the tightening sequence shown in the photo.
Then refit the sump, with a little gasket sealant where the sump joints meet.
LOF single mass flywheel
Fit the LOF single mass flywheel with the bolts supplied. First pass to 40 N·m in a star pattern, then a further 90°.
Tip. after the 40 N·m pass, draw a small line on each bolt head and on the flywheel. You’ll see straight away when you’ve done your quarter turn.
Clutch plate and pressure plate
Degrease the flywheel and the pressure plate: the slightest trace of grease will contaminate the new friction plate. Centre the plate on the LOF alignment tool, fit the pressure plate and torque it to 28 N·m, pulling it down evenly in a cross pattern.
Trap number one. the Gearbox side marking on the plate faces the gearbox. A plate fitted the wrong way round is the most common reason a Td5 clutch won’t disengage.
Fork and release bearing in the bell housing
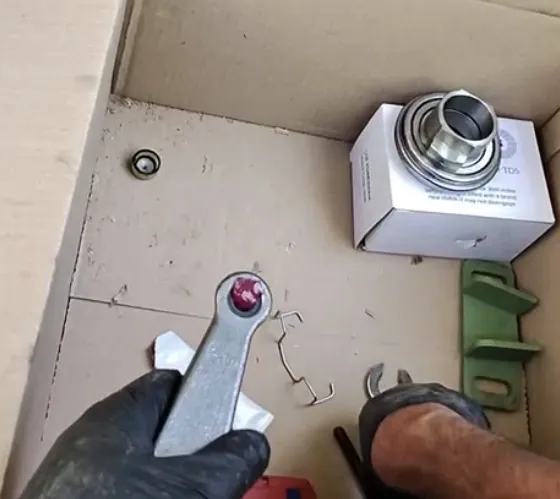
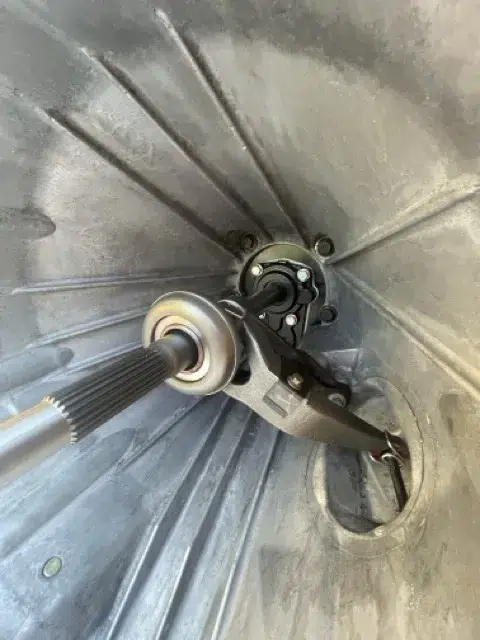
Remove the old fork and release bearing, clean out the bell housing and check the release bearing guide (if it’s scored, replace it). Grease the fork, then fit the clip with the help of the LOF video. Torque the fork bolt to 10 N·m and the two release bearing guide bolts to 25 N·m.
Final refit, bedding in and checks
The refit. The rest of your Defender Td5 clutch replacement goes back in reverse order, step by step, using the torque settings above. Line up the marks on the propshafts, and support the gearbox properly as you slide it back in: it must never hang on the clutch plate.
Bedding in. After a Defender Td5 clutch replacement, LOF recommends 300 to 500 miles (500 to 800 km) of gentle driving. No fully loaded hill starts, no prolonged slipping: a new clutch that overheats too early glazes its friction material, and it never recovers.
The checks. After the first few dozen miles, get back underneath: leaks, propshaft bolts, gearbox mounts, exhaust. Check the gearbox oil level too. If the pedal feels too low or the gears are notchy, look at pedal height and air in the hydraulics.
And write it all down in the service log: date, mileage, kit part numbers. The day you face another Defender Td5 clutch replacement, you’ll know exactly where you’re starting from.
 Checklist · printable
The mechanics are sorted, now for the packing
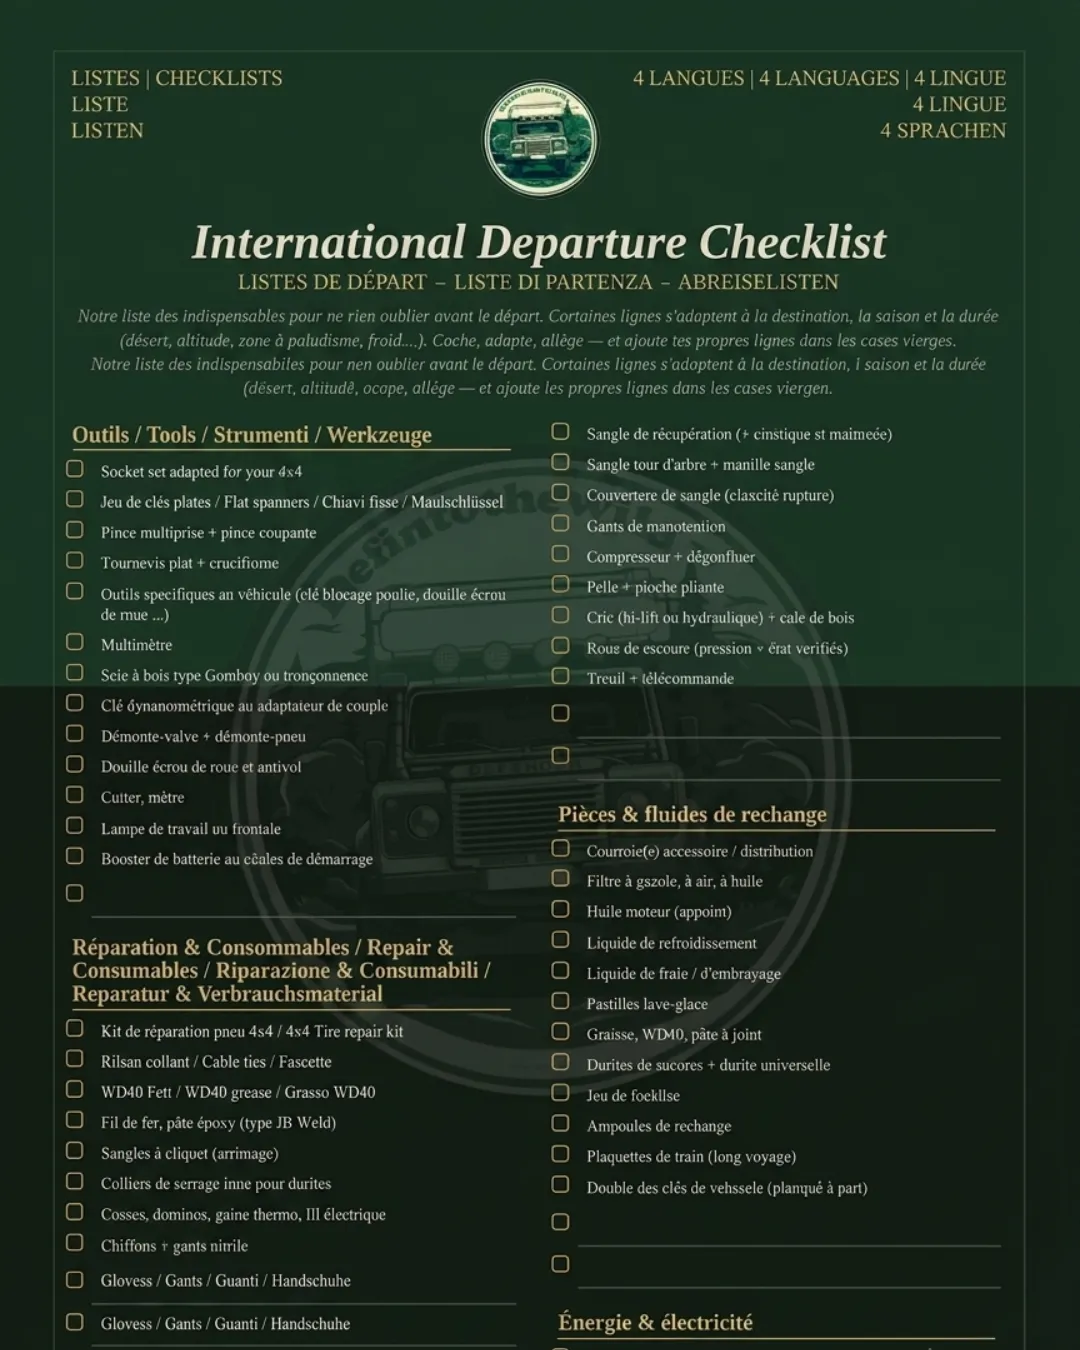
Tools, recovery gear, water, power, first aid kit, paperwork: we put our whole kit list into a separate guide, with a printable PDF checklist. It’s also where you decide which clutch spares are worth carrying.
The Defender is ready, now for the best bit: the tracks
A new clutch deserves a proper track. To save you hours of route planning, we’ve gathered the routes we’ve tested on the ground: drivable tracks, GPX files and GPS coordinates, ready to follow.
Our roadbooks guide you stage by stage, so you can enjoy the trip with a clear head.
 Tested routes · GPS
Your questions answered
FAQ: Defender Td5 clutch replacement
How long does a Defender Td5 clutch replacement take?
Allow around ten hours if you remove the transfer box and the gearbox separately, rear crank seal included. With an engine crane and the gearbox and transfer box coming out as one unit, the job goes a lot quicker.
Single mass or dual mass flywheel on a Td5?
The original dual mass flywheel wears with mileage: it develops play and can rattle when you switch the engine off. Replacing it with a new dual mass unit is expensive, so most people doing a Defender Td5 clutch replacement switch to single mass. A single mass flywheel is simpler and tougher, it’s what LOF recommends and it’s what we fitted.
Can I do a Defender Td5 clutch replacement myself?
Yes, with a methodical approach, a decent torque wrench, a chain hoist or engine crane and the right clutch alignment tool. It’s a long job but there are no hidden difficulties, as long as you stick to the torque settings and fit the plate the right way round.
Do I need to remove the transfer box for a Defender Td5 clutch replacement?
Not necessarily. Taking the LT230 off separately gives you two lighter units that one person can handle with a hoist. If you have an engine crane or a transmission jack, pulling the gearbox and transfer box together is faster.
Which LOF kit should I choose for a Defender Td5 clutch replacement?
LOF offers three levels: ROADspec for road use, POWERspec for vehicles that tow or travel loaded, and EXTREMEspec for bigger turbos and very hard use. On a Td5, LOF advises changing the flywheel every time and favours the single mass option. We went for EXTREMEspec.
Should I replace the spigot bush and the rear crank seal?
Yes. The brass spigot bush should be replaced every time, and LOF recommends it too. The rear crank seal is right there once the flywheel is off, so any Defender Td5 clutch replacement is the time to change it and to check the oil pump bolts.
How do I bed in a new clutch?
LOF recommends 300 to 500 miles (500 to 800 km) of gentle driving. Avoid slipping the clutch or letting it get hot during that time, or you risk glazing the friction material. If it starts to slip, ease off the throttle.
The clutch won’t disengage after fitting. What should I check?
First, the plate orientation (Gearbox side facing the gearbox), the most common mistake on a Defender Td5 clutch replacement. Then air in the hydraulics, pedal height, whether the fork and its clip are seated properly, and the condition of the input shaft splines.